Animaide Manual
In contrast to modeling, when animating there are not that many options to manipulate keys on an f-curve like you can with the vertices on a geometry. That is where AnimAide comes in.
There are some Blender options to manipulate keys, but AnimAide open the door to new possibilities. Not only has a wider range of tools but when working with a group of f-curves each one will have their local space.
This kind of tools is standard in the game and film industry.
Note: AnimOffset is on the headers by default now, but that can be changed in the addon preferences
Installation
Important
It is a good practice to remove the previous version of the addon (if you have one) before installing the new one.
If you are coming from the previous version, you might have some issues with the shortcuts. If that is the case you should go to “keymaps” in the preference window and there go to the “animation” sub-panel to delete any previous shortcut that might be conflicting.
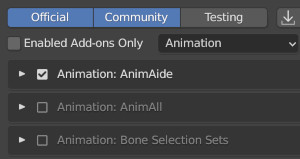
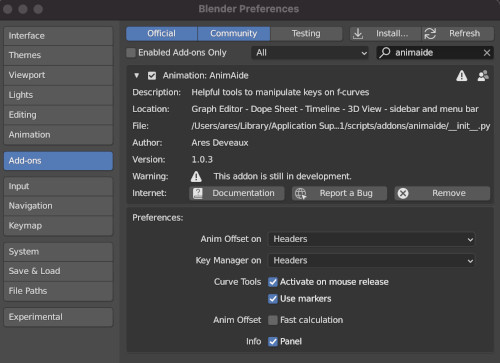
Download the latest release. Then in Blender, go to the “Add-ons” tab in the preference window. There click on the “Install” button and navigate to the folder where you downloaded the addon. After you select the file and click “Install Add-on”, AnimAide will be installed under the animation category:
Make sure the addon check-mark is active:
Settings
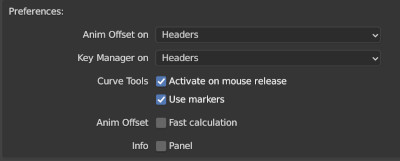
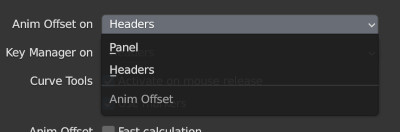
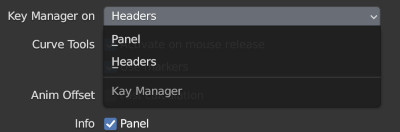
You can add most the panels to the headers now by selecting the new options on the addon preferences:
As you can see, you can also find others settings there that used to be in the main Blender interface:
Where to find AnimAide
It is available in some form in all animation editors plus the 3D View.
You can find AnimAide the sidebar in:
- Graph editor
- DopeSheet
- Timeline editors
- 3D View
You can show the sidebar by using the “n” shortcut while in one of the mentioned editors or go to the “View” menu on those areas and open it there.
Menu:
All the tools are also available in the Animaide menu under the GraphEditor, DopeSheet, and 3DView editors. Each menu is a bit different according to what can be used on each view. The one that has all the tools is the one in the GraphEditor.
GraphEditor menu:
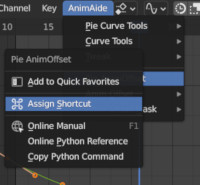
You can add your own shortcuts:
To do so find the tools on the “AnimAide” menu and right-click on one of them. You will then get an option to add a shortcut to it:
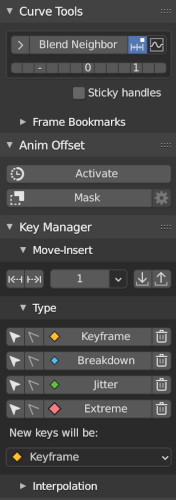
At the moment, Animaide has Three main panels:
- curveTools
- animOffset
- key_manager
CurveTools
These panel gives you helpful tools to simultaneously manipulate keys across multiple f-curves from either animated objects or animated bones in an armature.
In most cases these tools affect the selected keys using the neighboring unselected keys as reference. When activated from the 3DView it will act on all the f-curves in the current frame of the selected object or bone, but when it is used in the GraphEditor it will act on the selected keys of the selected channels.
How the interface works:
CurveTools shows as buttons in the interface. After selecting some keys on one or more f-curves, activate a tool by clicking the main big button with its name on it. The main button affects the keys in and interactive manner.
As you apply the tool information will also show in the status bar:
To select other tools as the active one, there is a pop-up menu next to the main button:
That is the overshoot button that allows a bigger range of change.
Below there is an array of small buttons that allows you to apply the tool in increments of 25%. It will use the last selected or activated.
CurveTools General info
It has two modes:
- Compact:
You will only see one tool at a time. The right button with a wave icon is a pop-up menu where you can select all the other tools.
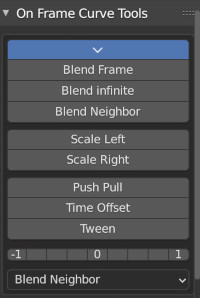
- Expanded:
Expand the tools view by clicking the arrow to the left. You then are able to work with all the tools at once. The pop-up menu moves to the bottom.
Any option needed by the active tools will be found at the bottom.
Note:
Some CurveTools don’t make much sense when used on the 3D-View, for that reason Only there a few are available there:
Curve Tools Settings:
Can now be found in the addon preferences:

- Activate on release: When this option is selected tools will behave similar to previous version in the sense that they will become active as soon as you select them. If you unselect it, tools will become active only after you left-click and drag.
- Use Markers: When selected markers will be added whenever a reference frame is created.
CurveTools Tips
- Combine Tools:
Experiment combination of tools to achieve desire effects:
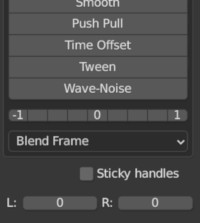
- Sticky Handles:
This used to be a bug but now that improved API tools took that away I thought to bring it back because can be useful at times. Basically, when active the key handles are left behind when the keyframe points are modified if the handle type is either “free” or “aligned”. This is a simple use case for this tool:
- Tweak tools:
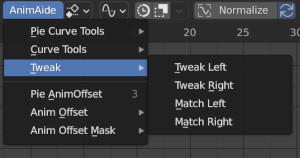
Create a shortcut for the Tweak tools if you like to work jumping from key to key adjusting the pose on each frame.
- Auto Key:
When no key is selected and “auto key” is on most curveTools will add a key where the cursor is.
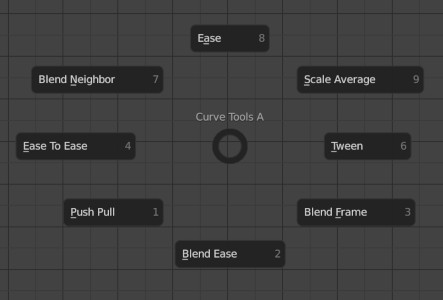
At the moment there are 18 different tools:
CurveTool List
Blend Ease
This is similar to “Ease”, but it remembers how the curve was before engaging the tool.
Blend Frame
Allows you to use specific frames in the animation as reference to match values on the selected keys. There are two buttons (Left and Right) that store the corresponding left and right reference frames. You can set reference frames by clicking those buttons.
By default, the option “Use markers” is active. With it, markers are position where the reference frames are. The markers are linked to the reference frames, so if you move the markers you also modify the reference frames.

it remembers how the curve was before engaging the tool.
You can save additional frames as bookmark for later use. You can find that option on a sub-panel called: Frame Bookmarks
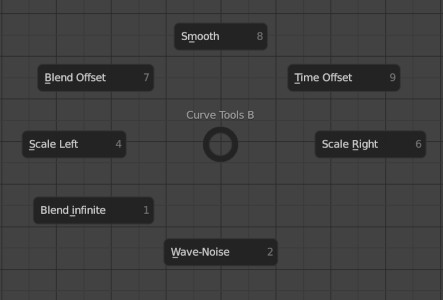
Blend Infinite
Lets you position the keys based on the slope created by the two neighboring keys to the left or the right.
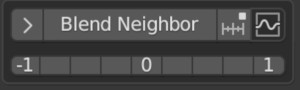
Blend Neighbor
Progressively makes the values of the selected keys match either of the neighboring keys. it remembers how the curve was before engaging the tool.
Blend Offset
Moves the selected keys as a block until it reaches either neighboring key
Ease
With this one, you arch the f_curve with either an ease-in or an ease-out. It does not remember how the curve was before activating the tool
Ease To Ease
This f-curve manipulator tool transition smoothly from one end to the next with ease-in and ease-out. It does not remember how the curve was before activating the tool.
Scale Average
Scale the values of the selected keys using the average of all the values as the anchor.

Scale Left
Scale the values of the selected keys using the left neighboring key as the anchor.
Scale Right
Scale the values of the selected keys using the right neighboring key as the anchor.
Smooth
It will try to average the values of the keys to smooth out the f-curve. You might have to run the slider more than once to get a smoother result.

Push-Pull
Exaggerates the values (push) or decreases the intensity of the animation (pull)
Time Offset
The effect is similar to sliding the keys in time, but with this option, the keys stay in the same frame. It works better when there are a lot of keys.
Tween
A simple linear transition between the neighboring keys
Wave-Noise
It adds random values to the selected keys when moving to the right and a wave pattern when moving to the left.
There are two pie menus with all the tools in them. You can find them in the Animaide menu. Assigning a shortcut to the pie menu would be advised.
AnimOffset
With this tool you can modify any animated object, and the change will propagate to the animation range. It can be filter by a mask. You can find the panel in all the animation editors, but the mask option just in the GraphEditor.
The mask has the option of adding a blending border that fades the effect of the tool. The interpolation can be adjusted in the preferences with the interpolation options.
Anim Offset panel:

It is on the animation views headers by default but can be put on the panel by going to the addon preferences window:
This is how the header looks like:
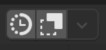
It has more or less icons depending on the panel or if a mask has been created.
AnimOffset Mask
While creating or modifying the mask you can use modifier keys to activate different options:
-
Without modifier: Creates the mask range, or moves the margins if the mask is already created.
-
Shift: Keeps the masking mode alive. You can use it in combination with “ctrl” and “alt”.
-
Ctrl: Soften the margins by adding blend transition to each margin. By holding it down keeps the blend manipulation alive.
-
Alt: Let you move the entire range at once. By holding it down keeps the range manipulation alive.
The status bar shows important information, including what the modifier keys do.

When a mask has been created and the tools is on the header, a new pencil icon shows up in the Graph Editor. This pencil activates a mask edit-mode that you can get out by using the “Escape” key, or your mouse right click button.

AnimOffset only works if the current frame is inside the margins. For this reason, when the mask is created or modified, the cursor will be position in the middle of the mask.
There is an option in the preferences called “autokey outside margins”, if selected, any time the cursor is outside the margins while manipulating the object it will create a key.

Selecting “Fast offset calculation” option in the addon preferences updates the f-curves only after the transformation is over:
In the mask options you can adjust the slope of the mask blend influence:
AnimOffset works seamlessly with Blender’s auto key:
There is a new pie menu with all the AnimOffset commands:
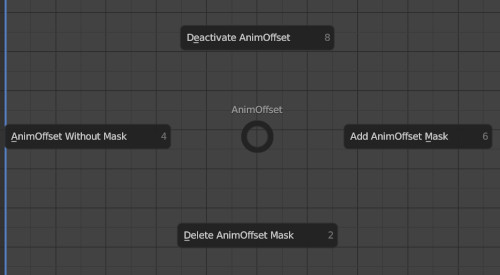
You can find it on the Animaide menu in the Graph Editor.
KeyManager
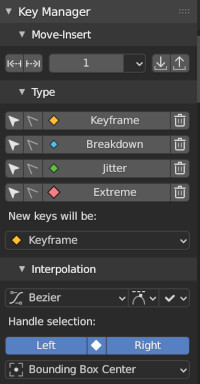
This toolbox mostly aims to speedup some tasks you already can do by adding extra options to some Blender Tools.
It has three main sections:
- Move-Insert
- Type
- Interpolation
Move-Insert
Move:
Move keys in time by a specified amount. If some keys are selected just those will be affected. If non are selected the key under the cursor will be affected.
Insert:
Insert frames between keys by a specified amount. If some keys are selected, frames will be inserted betwee those. If non is selected frames will be inserted where the cursor is.
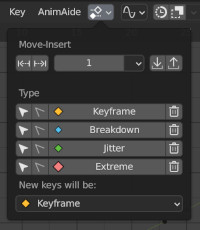
Type
Uses the colored Blender key types, and lets you “assign”, “select”, “unselect” and “delete” them by type.
It also incorporates a Blender option that lets you select the key type the auto-key will use.
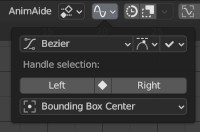
Interpolation
Lest you quickly assign interpolation types to key handles, just like Blender does, but with the added benefit of been able to assign it to every key in the selected object with the click of a button.
When dealing with “Bezier” curves, it lets you the left or right handles of every selected key to easily interact with a group of handles at once.
Header Option:
This panel can be moved to the animation views headers to make them more accessible.
When in the header the panel is devided in two:
- One that has all the options for keyframes:
You can find it on the Graph Editor, Dopesheet and Timeline headers.
- And another one that has all the options for the handles:
You can find this one only on the Graph editor header
Enjoy the addon :)